Picorder 2
The TR-109 Picorder 2 project aims to develop and produce a portable, self contained, Raspberry Pi based sensor data acquisition platform in the shape of a Tricorder from Star Trek the Next Generation.
It is the successor to the original Picorder. Originally the projects goal was to make a single Tricorder replica, but the Picorder 2 project has slowly lead to a set of standards for the Picorder family of devices I want to make.
Latest update:
Prototype 00 is now complete. Prototype 01 is under construction.
To Do:
-Finish Prototype 01
-Finish database groundwork.
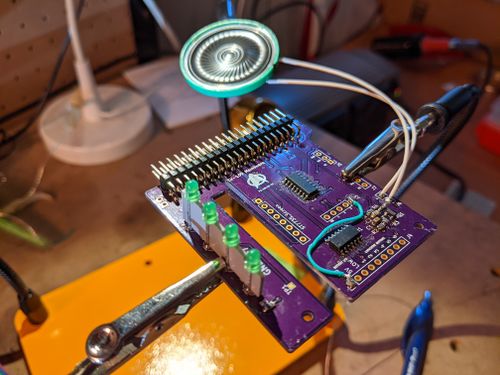
-Revise sensor board to account for missing connections on 74HC595
-Revise sensor board to account for disconnected ground fill.
Contents
Software
Picorder 2 will use PicorderOS a python library that unifies a number of different modules under a custom user interface.
Hardware
Prototype Units
Unit 00
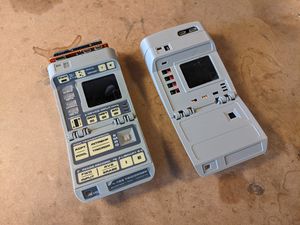
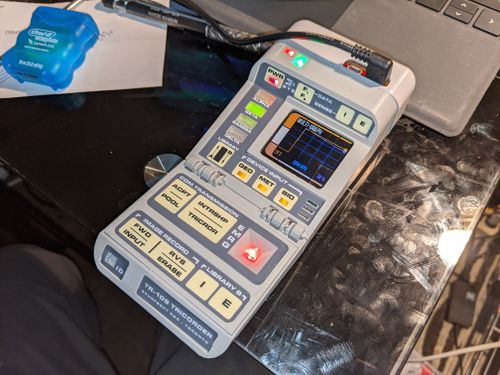
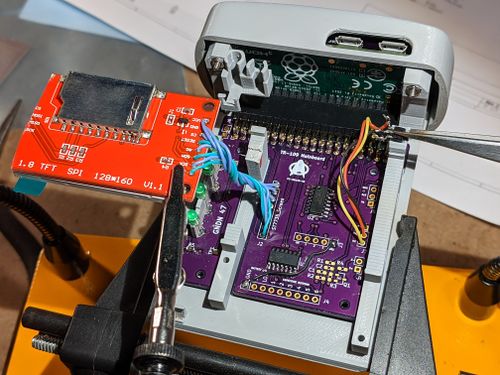
An initial "proof of concept" build. Using the first revision of the custom mainboard pcb as well as several off-the-shelf breakout boards from adafruit. Sensor board was a pi-hat protoboard with adafruit sensor breakouts. Unit 00 also served as a test bed for shift register controlled lighting, sticker fit and finish, and printed light diffusers. This prototype utilized a development sensor array and cap and was not indicative of the final version. Construction of this prototype is considered "complete".
Unit 01
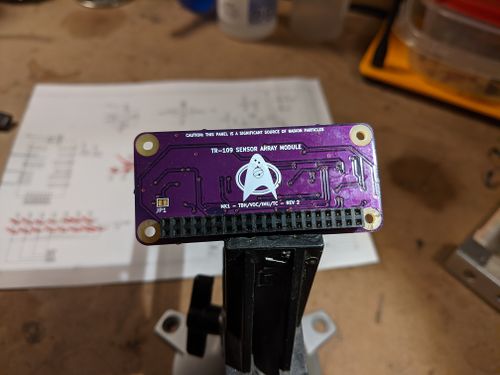
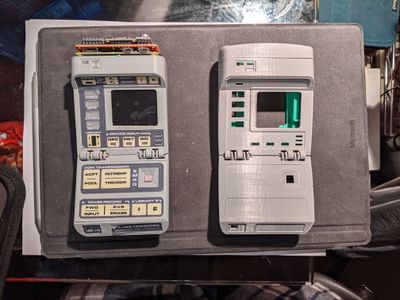
This "production" prototype will be used to iron out the remaining problems with integrated systems and hardware. It features a revision 2 mainboard and sensorboard PCB. Already problems have been found with the rev2 boards, and these are being catalogued for the rev3 boards. Unit 01 employs a new case design that attempts to more accurately capture the shape of the Tr-590 Mark VI Tricorder. The case changes are completely superficial and no changes have been made to the underlaying chassis-rail system. Early chassis designs will still work with this new enclosure.
Unit 02
This final prototype will be used to finalize the means of assembly. It will likely be the last Picorder of this series.
PCBs
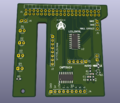
Custom PCBs are being produced for this project, they are designed in KiCad and will be available to the public when finished.
MainBoard
The Main Board hosts all the control electronics for capacitive touch, LED indication (operator facing), door close hall effect sensors, and graphical and audio output.
SensorBoard
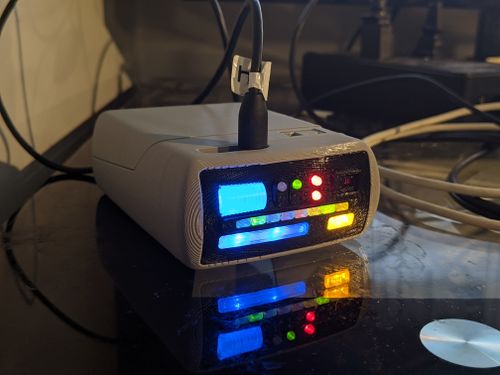
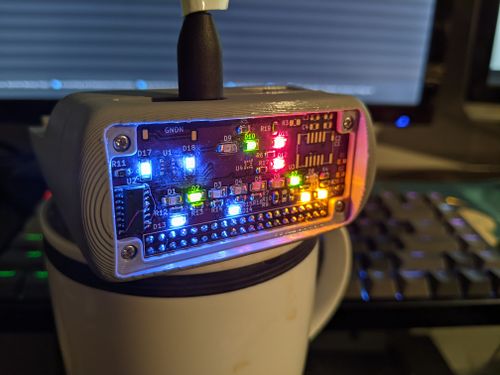
The Sensor Board hosts all the control electronics for LED indicators (forward facing) as well as any sensors that the device will address.
Changes
I had to change some elements of the design to allow for shift register controlled lighting and so the prototype pcb has been modified.
CPU
- Raspberry Pi Zero W
- My old favourite will return for this model. Power consumption was a MAJOR problem with the first Picorder, I have found a really good article on some ways to reduce power consumption. I am playing with the idea of using something like an arduino or just an ATTINY, but the Pi has so many advantages.
Sensors
Im using these sensors to develop the prototype:
- Bm860 VOC, Temp, Humidity, Pressure sensor
- The BME680 is a basic environmental sensor. VOC is a nice added feature. This sensor will provide ambient environmental information. I've found a good guide for how to connect it to a Pi.
- AMG8833 IR Thermal Camera
- This is a VERY low resolution and low range thermal camera. It will basically only be useful for detecting dramatic temperature differences. It was relatively cheap so I want to include it. This sensor will provide inaccurate CONTEXTUAL temperature information at range.
- MLX90614 Non Contact Thermometer
- A cheap and accessible non contact thermometer. This sensor provides accurate specific temperature readings at range. I've managed to find Adafruits own circuitpython implementation and this page looks fruitful too.
Other Options
Other possible sensor options include
- MiCS6814
- I was turned onto the idea of an 8 gas sensor by the ODROID-GO Ticorder project where they used this IC to measure carbon minoxide, nitrogen dioxide, hydrogen, ammonia, methane, propane, and iso-butane. I found a great blogpost on some ways to use it. Because it is an analog sensor I would need to use an ADC and some way to connect it to the Pi.
- An EMF sensor of some kind.
- Probably a resistor on an ADC to give me basic environmental electrical readings. I found this site that shows you how you can use at AT tiny as an i2c device, which I could use with this guide to make a small EMF detector to read low frequency interference. Another option suggested to me by reddit user 2CNK is to use an Elektrosluch like device to convert ambient EMI into some kind of data. I found a circuit example that might prove useful.
Audio
Audio was missing on the Picorder 1, I'd like to add it to this picorder if possible. I found a great instructable post by rgrokett for an audio solution that might work. In the comments I found a link to the raspberry pi forums that has some updated dtoverlay arguments that work on the newer pi os.
Shell
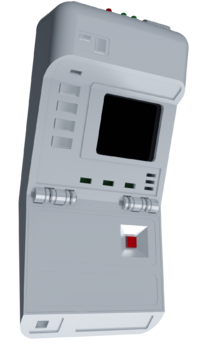
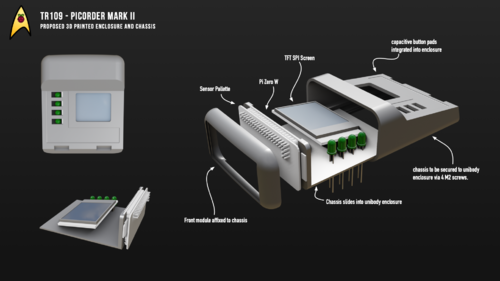
Picorder 2 will officially support a standardized 3D printed enclosure. This file will likely be included with picorderOS software. The case is designed to be several pieces that fasten together.
|
|
General Design
Recently I redesigned the shell on the Picorder to use a more accurate style of enclosure
The current design of the Picorder 2 shell incorporates a main body and chassis with a lower door. All of the major components are housed in the main body with the lower door being used for extra buttons and battery storage. The mainboard PCB is attached to the chassis, along with the Raspberry Pi, the sensor board and all internal lighting. The chassis slides in and out of the main body on tracks, and is secured to the main body with 4 M2 screws.
Custom printed stickers are used to add the labeled button areas.
Before I decided to use a 3D printed enclosure there were two "off the shelf" options that seemed suitable for the shell
- Mark 7 Tricorder Replica
- I've acquired a prop replica kit for the mark 7 tricorder from Stapleton Productions.
- 1993 Playmates Tricorder Toy
- For the prototype, this is easy to get and modify.
And I hope to be able to maintain support for those ideas as I continue developing the P2.
Input
- MPR121 Capacitive Touch Buttons <<OBSOLETE>>
- It turns out this component has been discontinued.
- Controller to use small metal pads for capacitive buttons for inputs. I found a good guide and software info for the Pi here.
Display
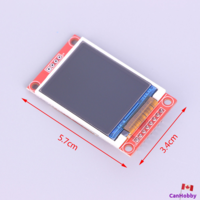
- Generic ST7735 LCD Display
- I've been using screens with of this type with the Luma.lcd python module. I bet you could also use FBTFT to use it as a display target (requires additional software modifications, but makes it usable as a small computer). The display I found (pictured) had no pins listed as MOSI or MISO (for SPI) but I found a pin chart in the Luma docs that helped.
I had considered the idea of also offering a low cost screen, but the availability is poor.:
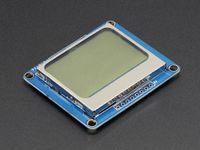
- Nokia 5110 LCD screen
- To provide low power information output to the user, and maybe to play some snake. I looked in a number of places to find a good guide on how to connect the Adafruit part I have with various descriptions around the web. I found this guide to have some important information, but the wiring information seemed incorrect. This guide lays out how to connect the screen properly..
LEDS
As with the original picorder I want to make sure that this one has a feel of the actual prop. the TOS tricorder only had 3 indicator lights but the TNG tricorder has many more. Since it seems ill advised to drive all the leds directly from the 3v3 GPIO pins of the Pi Zero I have decided to have a secondary driver for the LEDs capable of supplying the higher current. In order to facilitate this both the main board and the sensor board will include a 74HC595 shift register to drive the many lights on board. This should do for most of the lights on the picorder, but I am still testing.
I'm going to try and include at the very least:
- the four green indicator lights (alpha, beta, delta, gamma)
- the front panel sensor array (the green ripple lights, the various and sundry sensor illuminations)
- the EMRG button
- the PWR button.
- GEO, MET, BIO buttons.
ALPHA BETA GAMMA DELTA
Its always perplexed me that these indicator lights seem to ripple (light up and turn off one after the other) in different directions depending on the season of TNG you're watching.
It makes sense to me that the LEDs on the Tricorder should ripple from top to bottom (ALPHA to DELTA).
I have read (somewhere) that the TNG Tricorder lights were changed by a prop maker to run in the opposite direction only so they could tell when their work was being used on screen.
Gallery
Media Coverage
I'm delighted that my project has been noticed by some online publications
- Raspberry Pi Tricorder: The Next Generation - Ian Evenden, Tom's Hardware
- "TR-109 RASPBERRY PICORDER 2 REALLY NAILS THE STAR TREK AESTHETIC" - Lewin Day, Hackaday
This project is a "MyCorder" build and so I'm using this subreddit to solicit advice from the community.
